How to Crochet a Magic Ring (Magic Circle) for Beginners
The magic ring gives you a tight, hole-free start for toys, hats, and coasters. Here is how it works, plus fixes for the usual problems.


The first time I tried to start a little round toy, I made a chain of four, joined it with a slip stitch, and ended up with a hole in the middle big enough to lose a pea through. I thought I was just bad at amigurumi. Then someone showed me the magic ring, and the hole simply disappeared.
Jump to section
A magic ring (also called a magic circle) is a starting loop you can pull completely shut. You work your first round of stitches into the loop, then tug a tail, and everything cinches into a tight, neat center. It is the classic way to begin hats, flowers, coasters, and stuffed toys worked in the round.
It feels fiddly for about ten minutes and then becomes second nature. Lexie Loves Stitching made a clear tutorial showing the loop being formed in real time, and their video is below. Watch it once, then come back for my notes, my fixes for the usual problems, and ideas for what to make next.

What you need for a magic ring
Not much. The trick is the technique, not the gear. Still, a few choices make your first tries a lot easier, and I wish someone had told me them before I wasted a whole evening on black yarn.
- Smooth, light-colored worsted yarn. You can see the loop and the stitches clearly. Fuzzy or very dark yarn hides everything while you are learning.
- A hook that matches the yarn label. For worsted weight, most people reach for a mid-size hook, often around 5 mm. Use whatever the label suggests.
- Scissors and a yarn needle for weaving in the tail at the end.
- A stitch marker or a scrap of contrasting yarn to mark the start of each round.
Slippery cotton can be frustrating at first because the loop slides open on you. A grippy wool or acrylic blend is forgiving while you build the habit, and you can switch to cotton later once your hands know what to do.
How to make a magic ring, step by step
These are the general steps in my own words. The video shows the hand movements much better than text can, so use both together.
- Leave a tail of about six inches, then wrap the yarn around your fingers to make a loop, with the working yarn running to the ball and the tail hanging loose.
- Pinch the spot where the yarn crosses. This crossing is your anchor, and it stays in your fingers the whole time.
- Insert your hook into the loop from front to back and catch the working yarn (the strand attached to the ball).
- Pull that yarn back through the loop, then chain one to lock it. This chain does not count as a stitch.
- Insert the hook into the loop again, catching both the loop and the tail, and make your first single crochet. Keep making stitches this way until you have the number your pattern calls for, often six.
- Hold the ring steady and pull the tail slowly. One of the two strands will slide and the circle will close. If the wrong strand moves, pull the other one instead.
- Join the round with a slip stitch to the first stitch, or continue in a spiral, depending on your pattern.
Closing the ring is the satisfying part. Give the tail a firm tug, then a gentle wiggle to settle the stitches evenly around the center. If it looks lumpy, open it a little and let the stitches redistribute before tightening again.
Tips that save frustration
- Crochet over the tail. Hold the loop and the tail together as one piece and stitch around both. That way the ring can never unravel completely.
- Keep your thumb and finger on the crossing point. Most failures come from letting go of that spot halfway through a stitch.
- Count your stitches before you close. It is easy to lose count, and a miscounted first round spoils every round after it.
- Tighten before you start round two. Closing the center first shows you whether the stitches sit evenly around the circle.
- Practice with chunky yarn first. Thicker yarn makes the loop easier to see and handle, and the movements transfer to thinner yarn later.
If you want a first project that uses the ring right away, my crochet pumpkin tutorial starts with one, and it is a forgiving little shape to practice on.
Common mistakes and how to fix them
The ring will not close. You are probably pulling the wrong strand. Look at which of the two strands moves when you tug each one. Only one will slide the loop smaller, so pull that one.
The ring opens back up after closing. This happens when the tail was not secured. Weave the tail through a few stitches on the back, then loop it back the other way. Some people also tie a tiny knot with the tail and a neighboring stitch.
Stitches look crowded or twisted. Squeezing a full round into a small loop is normal, but make the loop a little bigger when you start so the stitches have room. You close it afterward anyway.
A small gap stays in the middle. Pull the tail harder, or use a thinner first round. If a tiny hole remains, stitch through it with the yarn needle and cinch it shut from the back.
Ways to use your magic ring
- Flat circles for coasters, rugs, and appliques. The scrap yarn doily coaster is a nice low-stakes project for this.
- Amigurumi heads, bodies, and limbs worked in a spiral with stuffing inside.
- Beanie and bucket hat crowns. The bucket hat tutorial is a good next step once your ring is reliable.
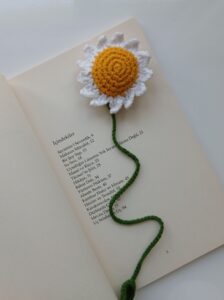
- Flower centers, where a tight middle looks much more polished.
- Small ornaments, such as snowflakes and stars.
Once you can make one ring confidently, try a different stitch in round one, like half double crochet. The method is identical, but the ring is a bit larger, so you will need to start with a slightly roomier loop.
Finishing and care
When your piece is done, thread the tail onto a yarn needle and weave it in along the back of the stitches for a couple of inches. Do not cut it short before you are sure the center is secure. If you are making a toy, check that the center of the ring is tight before adding stuffing, because it is much harder to fix afterward.
Take care of yarn projects according to the yarn label. Most acrylic can be hand washed gently and laid flat to dry. Wool needs more careful handling. If you are making something for a baby or a pet, choose washable yarn and make sure anything stuffed is sewn firmly, with no loose parts.
Frequently asked questions
Is the magic ring the same as a chain-and-join start?
No. Chaining and joining leaves a visible hole, while the magic ring can be pulled closed completely. The ring is usually neater for small toys and tight hat crowns.
How many stitches go into a magic ring?
It depends on the pattern. Six single crochet is very common for flat circles and amigurumi. Always follow the stitch count in your pattern so each round has the right number of stitches.
Why does my magic ring keep coming undone?
The tail was probably not secured. Pull the ring tight, then weave the tail through several stitches and back again. Crocheting over the tail in the first round helps too.