Dip Powder Nails at Home: A Beginner Step-by-Step
A friendly beginner guide to dip powder nails at home, with the steps, supplies and fixes I wish I had known on my first try.

The first time I tried dip powder, I expected a mess. Colored powder, a brush, a little pot of liquid, and my own two left thumbs. It turned out to be far more forgiving than I feared, and the result felt sturdier than regular polish on my nails.
Jump to section
If you have only done basic polish before, dip powder is a nice next step. There is no lamp to buy, and you build the color in thin layers that you can see and adjust as you go. The trick is learning the order of the steps and keeping everything thin.
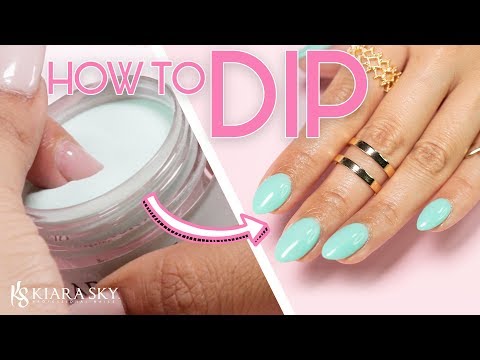
I found a clear beginner walkthrough from Kiara Sky Nails, and their tutorial is below. I have added my own notes, supply list and troubleshooting tips underneath so you can follow along at your own pace.
What dip powder actually is
Dip powder is a manicure system where you brush on a sticky base layer, dip your nail into fine colored powder, and then seal it with a hardening liquid called an activator. Layer by layer, the powder bonds into a hard, glossy coat.
It feels different from gel because nothing cures under a lamp. The activator does that job. Most people like it for how strong and even it looks, and it is a good match if you tend to chip regular polish in a day or two.
Supplies you need
- Nail prep: a gentle file, a buffer, a cuticle pusher, and a lint-free wipe.
- Dehydrator or cleanser: to remove oil from the nail surface.
- Base coat: the sticky layer the powder clings to.
- Colored dip powder: start with one simple shade.
- Activator: the liquid that hardens the powder.
- Top coat: a sealing layer for shine.
- Soft brush: for sweeping away loose powder.
- A small tray or paper plate: to catch the powder and save it for reuse.
Buy a system where the base, activator and top coat come from the same brand. They are made to work together, and mixing them is one of the quickest ways to get a cloudy or weak finish.
Step by step: your first dip manicure
- Prep the nails. Push back the cuticles gently, shape your nails, and lightly buff the shine off the surface. Wipe away the dust.
- Dehydrate. Wipe each nail with the cleanser so there is no oil left. Try not to touch them afterward.
- Brush on the base. Apply a thin layer, keeping it off the skin and away from the cuticle.
- Dip. While the base is still wet, dip the nail into the powder at a slight angle and roll it gently. Tap off the extra.
- Repeat. Do base, then dip, for two or three coats. Thin layers look neater than one thick one.
- Brush off the dust. Sweep away loose powder before the activator, so it does not clump.
- Activate. Brush on a thin coat of activator and let it dry fully. Wait as long as your product instructions say.
- Shape and buff. File any rough edges and smooth the surface lightly. Brush off the dust again.
- Finish. Add a thin layer of activator, then the top coat, and let it dry until it feels hard.
Take your time on the first hand. The second one always goes faster.
Tips that make it easier
- Work one nail at a time at first. Base, dip, tap, then move on.
- Pour a little powder into a separate tray, never dip straight from the jar. That keeps the main jar clean for future manicures.
- Keep the base coat thin. A big blob leads to a thick, lumpy nail.
- Leave a hair of space around the cuticle so the coat does not lift later.
- Brush the base along the free edge of the nail as well, so the tip is sealed.
- Do your thumbs last; they are the trickiest angle.
Common mistakes and how to fix them
Lumpy or thick nails. Usually too much base coat or too many dips. Buff gently with a fine file, then finish with activator and top coat.
Powder on the skin. Brush it off right away. If it stuck, use a cuticle stick after the top coat is dry, rather than scrubbing the wet surface.
Patchy color. Some shades, especially light ones, need an extra thin layer. Add another base and dip rather than piling it on.
Lifting at the cuticle. This often comes from skipped prep or product touching the skin. Next time, dehydrate well and leave a tiny gap.
Cloudy finish. Mixing brands or using old liquids can cause this. Check that your products belong together.
Ideas once you feel comfortable
A single solid color is a perfect start, but dip powder plays nicely with nail art too. You can brush a clear base over a finished nail and dust a contrasting powder onto the tip for an easy ombre. A neutral shade is lovely under a fine line design.
If you like the crisp look of a classic tip, have a look at my guide to doing a French tip at home and then try the same shape in powder. For a soft, clean look, simple white nail designs also work well once you have the layering down.
Keeping your manicure looking good
Treat dip powder like a strong manicure, not indestructible armor. Use your fingertips instead of your nails to pop open cans or scrape labels. Wear gloves for dishes and cleaning, and moisturize your cuticles with oil every day.
When it is time to take it off, do not peel it. Peeling can pull layers of your natural nail with it. Soak it off following the directions for your product, and give your nails a short rest afterward. If you are still learning basic care, my manicure at home guide covers the prep habits that make every style last.
A quick safety note: activators and removers contain strong solvents. Work in a room with open windows, keep them away from flames, and stop if your skin feels irritated.
Frequently asked questions
Do I need a UV lamp for dip powder?
No. The activator hardens the powder, so you do not need a lamp. That is one of the reasons beginners like it.
How many layers of powder should I use?
Two to three thin dips is typical. Go by your brand’s instructions, and add a layer only if the color looks patchy.
Can I reuse the powder?
If you pour a little into a separate tray and dip there, yes. Keep the dipped-in powder away from the main jar so the base coat does not contaminate it.